Vibrant Vistas: A Comprehensive Guide to Enhancing Colors in an Image with Photoshop’s Photo Filter
Introduction:
The world of digital imaging is a canvas of vibrant hues waiting to be explored, and Photoshop, a powerhouse in image editing, offers a myriad of tools to bring those colors to life. Among these tools, the Photo Filter feature stands out as a versatile option for enhancing and adjusting colors in photographs. In this comprehensive guide, we will delve into the art of color enhancement using Photoshop’s Photo Filter, providing insights into essential tools, step-by-step techniques, and advanced strategies to infuse images with captivating and dynamic colors.
Understanding the Photo Filter in Photoshop:
The Photo Filter tool in Photoshop is a versatile adjustment layer that allows users to apply color filters to an image, influencing its overall tonality and mood. Whether aiming to correct color casts, intensify specific hues, or infuse warmth or coolness into a scene, the Photo Filter provides a user-friendly interface for achieving precise color adjustments. With a range of preset filters and customizable options, this tool empowers photographers and designers to enhance the visual impact of their images with ease.
Essential Tools for Photo Filter Color Enhancement:
- Photo Filter Adjustment Layer:
- Access the Photo Filter by creating a Photo Filter Adjustment Layer through the “Layer” menu and selecting “New Adjustment Layer,” then “Photo Filter.”
- This non-destructive layer allows for experimentation and fine-tuning without affecting the original image.
- Filter Types and Colors:
- Choose from a variety of preset filters, such as Warming Filters (81, 85), Cooling Filters (80, 82), and more.
- Adjust the filter’s color intensity using the Density slider to control the strength of the effect.
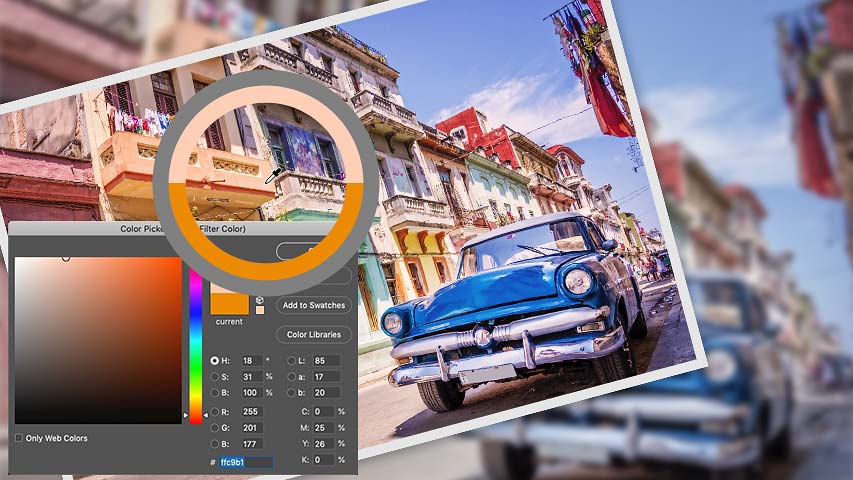
- Custom Color Picker:
- For more personalized adjustments, utilize the custom color picker within the Photo Filter Adjustment Layer.
- Select specific color values to precisely target and enhance desired hues in the image.
- Blend Modes:
- Experiment with blend modes to control the interaction between the Photo Filter layer and the underlying image.
- Commonly used blend modes for Photo Filter adjustments include Overlay, Soft Light, and Multiply.
Step-by-Step Guide to Enhancing Colors with Photo Filter:
- Open the Image in Photoshop:
- Begin by opening the image you want to enhance in Photoshop.
- Create a Photo Filter Adjustment Layer:
- Navigate to the “Layer” menu, select “New Adjustment Layer,” and choose “Photo Filter.”
- This creates a Photo Filter Adjustment Layer above the original image layer.
- Choose a Preset Filter:
- In the Photo Filter dialog box, choose a preset filter that aligns with your desired color enhancement.
- For example, warming filters can add a golden tone, while cooling filters can infuse a cooler, blue tone.
- Adjust Density and Color Intensity:
- Fine-tune the intensity of the selected filter by adjusting the Density slider.
- Experiment with different density levels to achieve the desired balance between subtlety and impact.
- Explore Custom Color Options:
- If presets don’t fully meet your requirements, explore the custom color picker option.
- Use the color picker to select specific hues that complement or enhance the existing colors in the image.
- Experiment with Blend Modes:
- Change the blend mode of the Photo Filter Adjustment Layer to Overlay, Soft Light, or Multiply for varying effects.
- Blend modes influence how the filter interacts with the underlying colors, allowing for creative adjustments.
- Fine-Tune with Opacity:
- Adjust the opacity of the Photo Filter layer to control the overall strength of the color enhancement.
- This provides a nuanced approach, allowing for subtle or bold adjustments as needed.
- Evaluate Before-and-After:
- Toggle the visibility of the Photo Filter Adjustment Layer to assess the before-and-after results.
- Ensure that the color enhancements enhance the image without sacrificing its overall visual integrity.
Advanced Techniques for Precision Color Enhancement:
- Selective Masking for Targeted Areas:
- Utilize layer masks to selectively apply the Photo Filter adjustment to specific areas of the image.
- Create masks and use brushes to reveal or conceal the color enhancement in specific regions.
- Gradient Masks for Gradual Color Changes:
- Apply gradient masks in conjunction with the Photo Filter adjustment for gradual color transitions.
- This technique is effective for creating nuanced shifts in color across different areas of the image.
- Blend Multiple Photo Filter Layers:
- For intricate color grading, experiment with using multiple Photo Filter Adjustment Layers.
- Each layer can target specific color ranges, allowing for complex and harmonious color adjustments.
- Combine with Additional Adjustment Layers:
- Enhance color adjustments further by combining the Photo Filter with other adjustment layers, such as Curves or Hue/Saturation.
- This approach provides a comprehensive toolkit for refining color balance and tonality.
- Color Correction with Photo Filter:
- Correct color casts in images by using complementary Photo Filter adjustments.
- Select filters that counteract unwanted color shifts, effectively balancing and neutralizing tones.
Workflow Integration and Efficiency:
- Save Photo Filter Presets:
- Save customized Photo Filter settings as presets for future use.
- This ensures consistency in color enhancements across different images and projects.
- Batch Processing:
- Apply Photo Filter adjustments to multiple images simultaneously using batch processing.
- This efficient workflow saves time when working with a series of photos that require similar color enhancements.
- Collaborative Editing:
- Collaborate with clients or stakeholders during the color enhancement process.
- Collect feedback and make adjustments collaboratively to align the final results with specific preferences.
Conclusion:
Enhancing colors in an image with Photoshop’s Photo Filter is a creative journey that allows photographers and designers to infuse vibrancy and mood into their visual compositions. By mastering the essential tools, following a step-by-step enhancement guide, and incorporating advanced techniques for precision color adjustments, users can transform their images into captivating visual narratives.
As creators embark on the path of color enhancement, the Photo Filter in Photoshop stands as a versatile ally, offering a spectrum of possibilities for creative expression. By integrating these techniques into their workflow, users can confidently navigate the intricacies of color editing, ensuring that each image resonates with dynamic and visually compelling colors that align with their artistic vision.


