Mastering Time: A Comprehensive Guide to Creating Hyper-Lapse Videos in Premiere Pro
Introduction: Hyper-lapse videos have gained immense popularity in recent years, captivating audiences with their mesmerizing time-lapse sequences that showcase the passage of time in a dynamic and exhilarating manner. Adobe Premiere Pro, a leading video editing software, offers a robust suite of tools and features that empower creators to craft stunning hyper-lapse videos with precision and creativity. In this comprehensive guide, we’ll embark on a journey through the intricacies of creating hyper-lapse videos in Premiere Pro, unraveling techniques, workflows, and expert insights to help you unlock the full potential of this captivating visual medium.
Understanding Hyper-Lapse Videos: A hyper-lapse video is a form of time-lapse photography that involves capturing a series of still images over an extended period while moving the camera between each shot to create the illusion of motion and perspective changes. Unlike traditional time-lapse videos, which are typically captured from a stationary position, hyper-lapse videos feature dynamic camera movements that add a sense of depth, scale, and excitement to the footage. By meticulously aligning and blending the individual frames in post-production, editors can transform the raw image sequence into a seamless and immersive hyper-lapse video that transports viewers on a journey through time and space.
Step-by-Step Guide to Creating Hyper-Lapse Videos in Premiere Pro:
- Plan Your Hyper-Lapse: Before embarking on a hyper-lapse shoot, carefully plan your route and identify key landmarks or points of interest along the way. Consider factors such as the duration of the hyper-lapse, the speed of camera movement, and the desired framing and composition for each shot.
- Set Up Your Camera: Mount your camera on a stable tripod and adjust the settings for manual exposure, focus, and white balance. Use a wide-angle lens to capture a broad field of view and ensure consistent lighting conditions throughout the shoot.
- Capture the Sequence: Begin capturing the hyper-lapse sequence by taking a series of still images at regular intervals while moving the camera between each shot. Maintain a steady pace and smooth camera movement to ensure smooth transitions between frames.
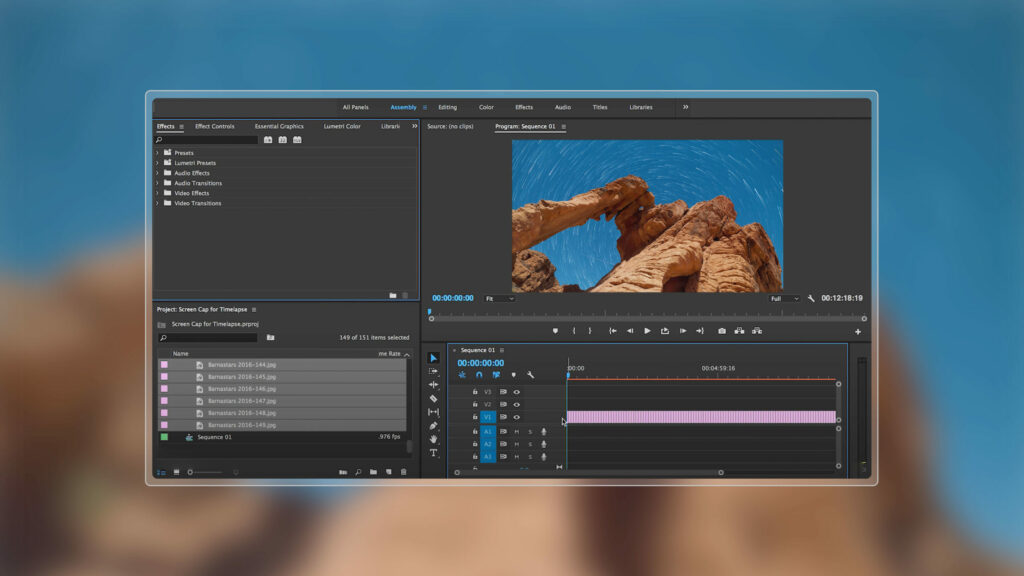
- Import Footage into Premiere Pro: Transfer the captured images to your computer and import them into Premiere Pro. Organize the images into a dedicated folder for easy access and management.
- Create a New Sequence: Start by creating a new sequence in Premiere Pro that matches the resolution and frame rate of your hyper-lapse footage. Drag and drop the first image of the sequence onto the timeline to create the initial clip.
- Adjust Clip Duration: Adjust the duration of each image clip on the timeline to determine the speed and pacing of the hyper-lapse sequence. Shorter clip durations will result in faster motion, while longer clip durations will create a slower-paced hyper-lapse.
- Apply Time Remapping: Right-click on the image clip on the timeline and select “Speed/Duration” from the context menu. Enable time remapping for the clip and use keyframes to adjust the speed and timing of the hyper-lapse sequence. Experiment with different timing curves and interpolation methods to achieve smooth and fluid motion.
- Stabilize Footage (Optional): If the hyper-lapse footage exhibits any unwanted camera shake or motion blur, apply stabilization effects in Premiere Pro to smooth out the motion and improve the overall quality of the footage. Use the Warp Stabilizer effect to automatically analyze and stabilize the hyper-lapse sequence.
- Color Correction and Grading: Enhance the visual impact of the hyper-lapse footage by applying color correction and grading effects in Premiere Pro. Adjust the exposure, contrast, saturation, and color balance to achieve a consistent and cinematic look that enhances the mood and atmosphere of the video.
- Add Music and Sound Effects: To further enhance the viewing experience, add music and sound effects to the hyper-lapse video in Premiere Pro. Choose audio tracks that complement the mood and tempo of the footage and use audio effects to blend the audio seamlessly with the visuals.
- Export and Share: Once you’re satisfied with the hyper-lapse sequence, export it out of Premiere Pro to create the final video file. Go to File > Export > Media and choose the desired export settings, format, and destination for your video. Click Export to render and save the hyper-lapse video for sharing or distribution.
Tips and Best Practices for Creating Hyper-Lapse Videos in Premiere Pro:
- Use Manual Settings: Set your camera to manual mode to ensure consistent exposure, focus, and white balance settings throughout the hyper-lapse shoot. This helps maintain visual continuity and prevents exposure flicker or focus shifts in the final footage.
- Plan Camera Movements: Plan your camera movements carefully to create dynamic and engaging hyper-lapse sequences. Experiment with different camera angles, heights, and perspectives to capture unique and captivating shots that showcase the environment and surroundings.
- Shoot in RAW Format: If possible, shoot your hyper-lapse sequences in RAW format to retain maximum image quality and flexibility in post-production. RAW images contain more image data and offer greater latitude for exposure and color adjustments in Premiere Pro.
- Experiment with Frame Rates: Experiment with different frame rates for your hyper-lapse sequences to achieve different visual effects and motion blur characteristics. Higher frame rates result in smoother motion and more fluid transitions between frames, while lower frame rates create a more stylized and choppy look.
- Maintain Consistent Movement: Maintain a consistent pace and rhythm when moving the camera between shots to ensure smooth and fluid motion in the hyper-lapse sequence. Avoid abrupt changes in speed or direction, as these can detract from the overall visual impact of the footage.
- Plan for Post-Production: Keep in mind that the majority of the hyper-lapse magic happens in post-production. Plan your editing workflow and prepare for extensive time remapping, stabilization, and color grading to achieve the desired look and feel for your hyper-lapse video.
Conclusion: Creating hyper-lapse videos in Premiere Pro is a rewarding and exhilarating process that offers endless creative possibilities for storytellers and filmmakers. By following the steps outlined in this comprehensive guide and incorporating tips and best practices, you’ll be well-equipped to embark on your own hyper-lapse adventures and craft stunning visual journeys through time and space. So, grab your camera, plan your route, and let your creativity soar as you master the art of hyper-lapse videography in Premiere Pro.


