How to manage storage spaces in Windows 8
Managing storage spaces in Windows 8 is an essential aspect of maintaining and optimizing your computer’s storage infrastructure. Storage Spaces is a feature introduced in Windows 8 that allows users to create virtual drives with varying levels of redundancy and performance characteristics, effectively pooling together physical storage devices to create a unified storage solution. This feature provides flexibility, scalability, and fault tolerance, making it ideal for both home and enterprise environments. In this comprehensive guide, we’ll explore everything you need to know about managing storage spaces in Windows 8, from creating storage pools to configuring virtual drives and optimizing storage performance.
Understanding Storage Spaces:
Storage Spaces is a feature in Windows 8 that allows users to create virtual drives, known as storage pools, from one or more physical storage devices, such as hard drives or solid-state drives (SSDs). These storage pools can then be divided into virtual drives, known as storage spaces, which appear as regular drives in Windows Explorer. Storage Spaces offers several benefits, including:
- Flexibility: Storage Spaces allows users to create virtual drives with varying levels of redundancy and performance characteristics, depending on their storage requirements.
- Scalability: Users can easily add or remove physical drives from storage pools to expand or shrink storage capacity as needed.
- Fault Tolerance: Storage Spaces supports mirroring and parity, allowing users to protect their data against drive failures and ensure high availability.
Managing Storage Spaces:
To manage storage spaces in Windows 8, follow these steps:
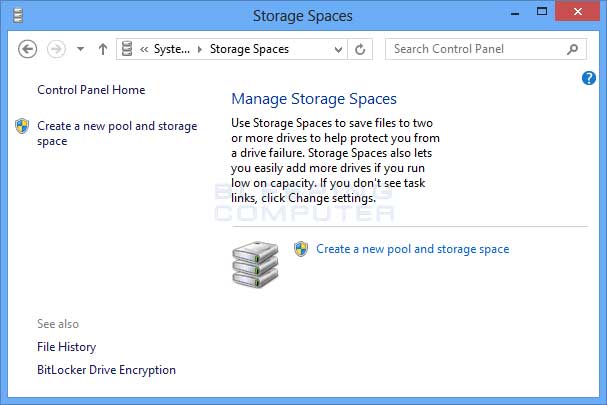
- Open Storage Spaces: Press the Windows key to open the Start menu, then type “Storage Spaces” in the search bar. Click or tap on “Storage Spaces” in the search results to launch the application.
- Create a Storage Pool: In Storage Spaces, click or tap on “Create a new pool and storage space.” Select the physical drives you want to include in the storage pool, then click or tap on “Create pool” to create the pool.
- Create a Storage Space: After creating the storage pool, click or tap on “Create a new storage space.” Specify the size and other settings for the storage space, then click or tap on “Create storage space” to create the space.
- Configure Storage Spaces: Once the storage space is created, you can configure settings such as resiliency type (mirroring or parity), drive letter assignment, and file system format.
- Add Drives: To expand the storage pool, you can add additional physical drives to the pool by clicking or tapping on “Add drives” and selecting the drives you want to add.
- Remove Drives: If you need to remove drives from the storage pool, you can do so by clicking or tapping on “Remove drives” and selecting the drives you want to remove. Note that removing drives may result in data loss if the pool does not have sufficient redundancy.
Optimizing Storage Spaces Performance:
To optimize storage spaces performance in Windows 8, consider the following tips:
- Use SSDs for Cache: If possible, use solid-state drives (SSDs) as cache drives to improve storage spaces performance. SSDs can significantly accelerate read and write operations, especially for random access workloads.
- Enable Write-back Cache: Enable write-back cache for storage spaces to improve write performance. Write-back cache temporarily stores write operations in memory before committing them to disk, reducing latency and improving throughput.
- Use ReFS File System: Consider using the Resilient File System (ReFS) for storage spaces, especially for larger deployments. ReFS offers improved data integrity and reliability, making it well-suited for storage spaces deployments where data integrity is critical.
- Monitor Performance: Regularly monitor storage spaces performance using built-in Windows tools or third-party monitoring solutions. Pay attention to metrics such as throughput, latency, and IOPS (input/output operations per second) to identify performance bottlenecks and optimize storage configurations accordingly.
Troubleshooting Storage Spaces:
If you encounter issues with storage spaces in Windows 8, consider the following troubleshooting steps:
- Check Drive Health: Verify the health of physical drives in the storage pool using built-in Windows tools or third-party disk monitoring utilities. Replace any failing drives to prevent data loss and maintain system reliability.
- Update Drivers and Firmware: Ensure that you have the latest drivers and firmware installed for your storage devices, including disk controllers and hard drives. Outdated drivers or firmware can cause compatibility issues and degrade performance.
- Check for Updates: Check for updates to Windows and storage spaces-related components, such as Storage Spaces drivers and management tools. Microsoft regularly releases updates to address bugs, improve performance, and add new features.
- Review Event Logs: Review Windows event logs for any storage spaces-related errors or warnings. Event logs can provide valuable insights into the root cause of issues and help troubleshoot problems effectively.
Conclusion:
Managing storage spaces in Windows 8 is essential for maintaining a reliable, scalable, and high-performance storage infrastructure. Whether you’re creating storage pools, configuring virtual drives, or optimizing storage performance, Storage Spaces offers a range of features and capabilities to meet your storage needs. By understanding how to create and manage storage spaces effectively, users can leverage this powerful feature to improve data availability, scalability, and fault tolerance in their Windows 8 environments. With its flexibility, scalability, and fault tolerance, Storage Spaces is a valuable tool for both home users and enterprise environments, providing a unified storage solution that meets the demands of modern computing.


