A Comprehensive Guide to Downloading Photos from Your Camera with Adobe Bridge
Introduction:
Capturing moments with your camera is a gratifying experience, and the subsequent step of transferring those precious photos onto your computer should be just as seamless. Adobe Bridge, a robust digital asset management tool, offers a user-friendly and efficient solution for downloading photos from your camera. This comprehensive guide aims to walk you through the process, providing detailed insights into utilizing Adobe Bridge to effortlessly transfer and manage your photographic treasures.
Section 1: Preparing Your Camera and Connecting to Adobe Bridge
1.1 Checking Camera Compatibility: Before diving into the download process, ensure that your camera is compatible with Adobe Bridge. Most modern cameras are supported, but it’s always wise to check Adobe’s official website for the latest compatibility information.
1.2 Installing Adobe Bridge: If Adobe Bridge is not already installed on your computer, this section guides you through the installation process. Adobe Bridge typically comes bundled with other Adobe Creative Cloud applications, providing a comprehensive suite for your creative endeavors.
1.3 Connecting Your Camera: With Adobe Bridge installed, connect your camera to your computer using the appropriate USB cable. Turn on your camera and set it to the mode that allows for data transfer. Adobe Bridge should recognize the connected camera, prompting you to begin the import process.
Section 2: Navigating the Adobe Bridge Import Panel
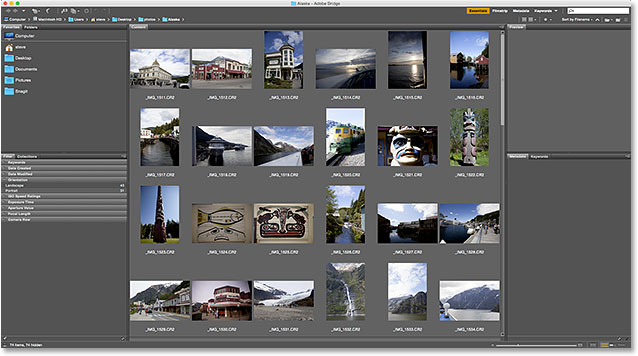
2.1 Opening Adobe Bridge: Launch Adobe Bridge on your computer. The software’s intuitive interface will welcome you with various panels and workspaces. Focus on the Import panel, which is designed specifically for downloading photos from your camera.
2.2 Understanding the Import Panel Layout: Familiarize yourself with the elements of the Import panel. Adobe Bridge presents a preview of your images, along with options to set the destination folder, apply metadata, and choose the organization structure for the imported files.
2.3 Previewing and Selecting Images: Preview the images on your camera within Adobe Bridge’s Import panel. Use the thumbnail view to review and select the photos you want to download. Utilize Adobe Bridge’s built-in preview options to ensure you are transferring the right set of images.
Section 3: Configuring Import Settings in Adobe Bridge
3.1 Setting Destination Folders: Choose the destination folder on your computer where you want to store the downloaded images. Adobe Bridge allows for flexible folder organization, enabling you to create subfolders based on date, event, or any other criteria.
3.2 Applying Metadata: Enhance the organization and searchability of your photos by applying metadata during the import process. Adobe Bridge provides options to add keywords, copyright information, and other relevant details to your images.
3.3 Renaming Files: Standardize your file names for better organization. Adobe Bridge enables you to rename files based on various criteria such as date, custom text, or sequence numbers, ensuring consistency in your photo library.
Section 4: Initiating the Photo Download Process
4.1 Checking Import Options: Before initiating the download, review the import options provided by Adobe Bridge. Confirm that the settings align with your preferences for file handling, metadata application, and other parameters.
4.2 Selecting Import or Download: Adobe Bridge offers both “Import” and “Download” options. Choose “Import” if you want to retain a copy of the images on your camera after the download. Opt for “Download” if you intend to remove the photos from your camera’s memory card after the transfer.
4.3 Monitoring the Download Progress: Once the download process begins, Adobe Bridge provides a progress indicator. Monitor the status to ensure a smooth and complete transfer of your photos. The software will notify you when the download is successfully completed.
Section 5: Post-Download Organization and Management
5.1 Reviewing Imported Images: After the download, navigate to the destination folder within Adobe Bridge. Review the imported images to confirm that they match your expectations and are ready for further organization or editing.
5.2 Organizing Images Within Adobe Bridge: Explore Adobe Bridge’s organizational features to further arrange and categorize your downloaded images. Create collections, apply star ratings, or use keywords to enhance the accessibility of your photo library.
5.3 Backing Up Your Photos: As a best practice, consider backing up your downloaded photos to an external storage device or cloud service. Adobe Bridge makes it easy to duplicate files or synchronize your photo library with external backups for added security.
Conclusion:
Adobe Bridge stands as a versatile and efficient tool for managing your digital assets, and this guide has empowered you to seamlessly download photos from your camera using this robust software. By following the steps outlined, you can navigate Adobe Bridge’s Import panel, configure settings, and initiate a smooth download process, ensuring that your photographic journey transitions seamlessly from your camera to your computer. With Adobe Bridge, the joy of capturing moments is complemented by the convenience of organized and accessible photo management.


