Mastering Clarity and Precision: A Comprehensive Guide to Creating and Managing Signal Arrows in Autodesk Electrical

In the realm of electrical design, clarity and precision are paramount. Signal arrows play a crucial role in elucidating the flow of electrical signals within schematics, facilitating comprehension and ensuring accuracy in design documents. Autodesk Electrical offers a suite of tools to create and manage signal arrows effectively, empowering users to enhance clarity, streamline communication, and optimize their design workflows. This extensive guide navigates users through the intricacies of leveraging signal arrows in Autodesk Electrical, offering step-by-step instructions, best practices, and expert insights to maximize their utility.
Understanding Signal Arrows in Autodesk Electrical
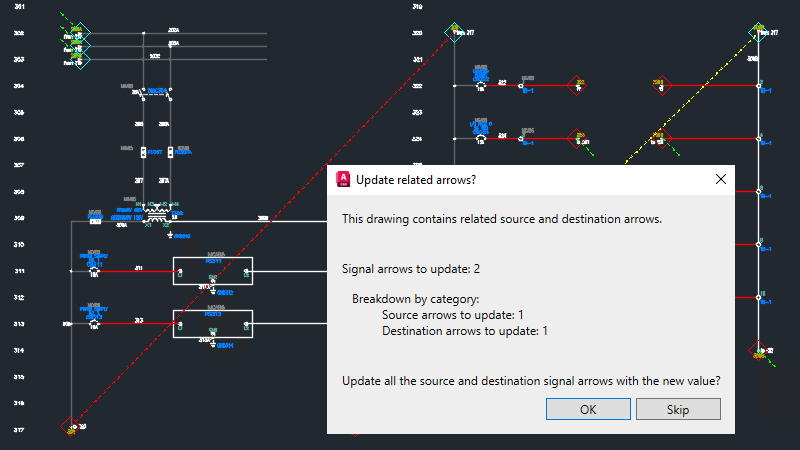
Signal arrows serve as visual indicators within schematics, delineating the direction and flow of electrical signals between components, terminals, and circuits. In Autodesk Electrical, signal arrows are customizable elements that can be tailored to match specific design requirements and preferences. Key attributes of signal arrows include:
- Directional Clarity: Clearly depict the flow of electrical signals, enhancing comprehension and communication within schematics.
- Customization Options: Offer a range of customization options, including arrow style, color, size, and annotations, to meet diverse design needs.
- Integration with Design: Seamlessly integrate with schematic drawings, allowing users to annotate and illustrate signal paths within the context of their designs.
- Consistency and Standardization: Facilitate consistency and standardization across projects by adhering to predefined signal arrow conventions and guidelines.
Creating Signal Arrows in Autodesk Electrical
Let’s explore the step-by-step process of creating signal arrows in Autodesk Electrical:
Step 1: Accessing the Signal Arrow Tool
- Launch Autodesk Electrical and open the schematic drawing where you wish to add signal arrows.
- Navigate to the “Schematic” tab on the ribbon toolbar.
- Click on the “Signal Arrow” tool icon to activate the Signal Arrow mode.
Step 2: Placing Signal Arrows
- With the Signal Arrow mode activated, click on the location within the schematic where you want to place a signal arrow.
- Specify the direction and orientation of the signal arrow by clicking and dragging to define the arrow’s path.
Step 3: Customizing Signal Arrows
- Customize the appearance of signal arrows by selecting from a range of predefined arrow styles, colors, and sizes.
- Add annotations or labels to signal arrows to provide additional context or information, such as signal names or descriptions.
Managing Signal Arrows in Autodesk Electrical
Once signal arrows are created, it’s essential to effectively manage and maintain them to ensure consistency and clarity in design documents. Here are some key aspects of managing signal arrows in Autodesk Electrical:
- Standardization: Establish standardized conventions and guidelines for signal arrow usage, including arrow styles, colors, and annotations.
- Consistency: Ensure consistency in signal arrow placement and orientation to maintain clarity and readability within schematics.
- Documentation: Document signal arrow conventions and guidelines for reference and training purposes.
- Revision Control: Maintain version control to track changes and revisions to signal arrows and facilitate collaboration among design team members.
Best Practices for Using Signal Arrows
To optimize the use of signal arrows in Autodesk Electrical, consider the following best practices:
- Clear Communication: Use signal arrows to clearly communicate the flow of electrical signals and connections within schematics.
- Attention to Detail: Pay attention to the placement, orientation, and styling of signal arrows to ensure accuracy and clarity.
- Collaboration: Foster collaboration among design team members to ensure alignment and consistency in signal arrow usage.
- Continuous Improvement: Solicit feedback from users and stakeholders to identify areas for improvement and implement enhancements to signal arrow functionality and usability.
Conclusion
Signal arrows in Autodesk Electrical serve as invaluable tools for enhancing clarity, precision, and communication within electrical designs. By following the step-by-step guide and best practices outlined in this comprehensive guide, users can effectively leverage signal arrows to streamline communication, improve comprehension, and optimize their design workflows. Whether you’re a seasoned professional or a novice user, mastering the creation and management of signal arrows will empower you to elevate your electrical design capabilities and achieve greater success with Autodesk Electrical.


