Mastering Stability: A Comprehensive Guide to Using the Warp Stabilizer in Adobe After Effects
James April 22, 2024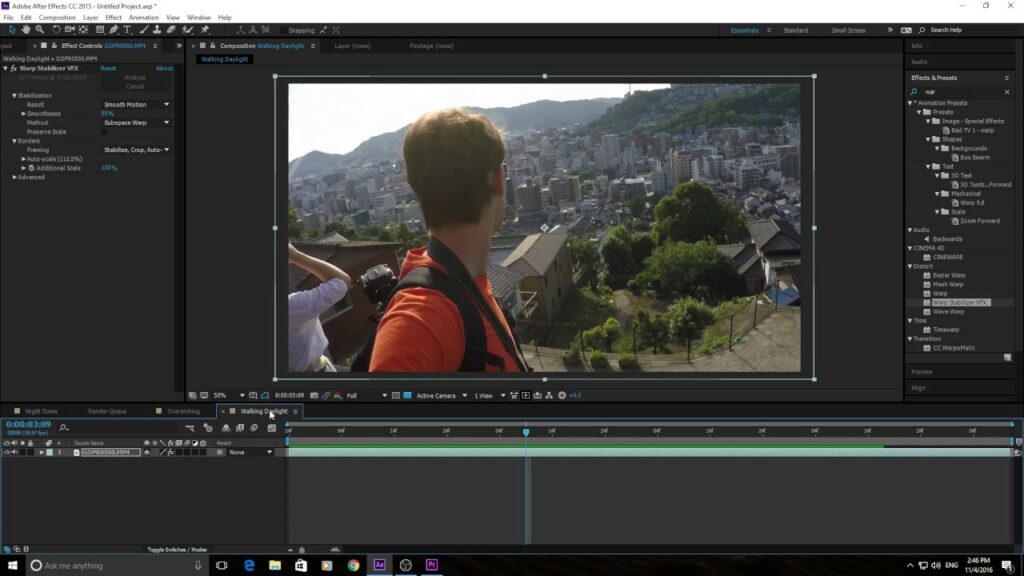
Introduction:
The Warp Stabilizer is a powerful tool in Adobe After Effects that allows users to stabilize shaky or handheld footage, resulting in smooth and professional-looking shots. Whether you’re working on a film, commercial, or personal project, mastering the Warp Stabilizer can greatly enhance the quality and visual appeal of your footage. In this extensive guide, we’ll explore the step-by-step process of using the Warp Stabilizer in Adobe After Effects, covering everything from basic stabilization techniques to advanced tips and tricks for achieving optimal results.
Understanding the Warp Stabilizer in Adobe After Effects:
The Warp Stabilizer is a built-in effect in Adobe After Effects that analyzes the motion within a video clip and applies corrective adjustments to stabilize the footage. It works by automatically tracking and smoothing out camera movements, reducing unwanted jitter, shake, and motion artifacts. The Warp Stabilizer can be applied to a wide range of footage, including handheld shots, drone footage, and even footage shot with a stabilizer or gimbal.
Key Components of Using the Warp Stabilizer in Adobe After Effects:
Understanding the key components of using the Warp Stabilizer in Adobe After Effects is essential for achieving smooth and professional-looking results. Some key components include:
- Analysis: The Warp Stabilizer analyzes the motion within the footage to identify camera movements, jitter, shake, and other motion artifacts. It automatically tracks the motion of pixels within the footage and calculates the amount and direction of camera movement over time.
- Stabilization: Once the analysis is complete, the Warp Stabilizer applies corrective adjustments to stabilize the footage. It uses advanced stabilization algorithms to smooth out camera movements and reduce unwanted jitter or shake, resulting in smooth and steady shots.
- Controls: The Warp Stabilizer provides controls and parameters that allow users to customize the stabilization settings according to their preferences. These controls include parameters such as smoothness, method, framing, and detailed analysis, allowing for precise adjustments to the stabilization effect.
Step-by-Step Guide to Using the Warp Stabilizer in Adobe After Effects:
Follow these step-by-step instructions to use the Warp Stabilizer in Adobe After Effects:
- Import Footage:
- Launch Adobe After Effects and create a new project.
- Import the footage you want to stabilize into your project by selecting “File” > “Import” > “File” from the menu.
- Apply Warp Stabilizer:
- Drag and drop the footage layer into the Timeline panel.
- Apply the Warp Stabilizer effect to the footage layer by selecting the layer and choosing “Animation” > “Warp Stabilizer” from the menu. After Effects will automatically analyze the motion of the footage and apply stabilization adjustments.
- Adjust Stabilization Settings:
- After Effects will analyze the motion of the footage and apply default stabilization settings. Adjust stabilization settings such as smoothness, method, framing, and detailed analysis to fine-tune the stabilization effect according to your preferences.
- Monitor Progress:
- After applying stabilization adjustments, monitor the progress of the stabilization process in the Effect Controls panel. The progress indicator will show the status of the stabilization analysis and the estimated time remaining.
- Preview Stabilized Footage:
- Preview the stabilized footage in the Composition panel to assess the stabilization effect. Scrub through the timeline or play the footage to see how the stabilization adjustments have affected the motion of the footage.
- Refine Stabilization:
- If necessary, refine the stabilization settings to achieve the desired result. Make adjustments to parameters such as smoothness, method, framing, and detailed analysis based on the visual appearance of the stabilized footage.
- Render and Export:
- Once you’re satisfied with the stabilization effect, render the composition by selecting “Composition” > “Add to Render Queue” from the menu. Configure render settings such as format, codec, resolution, and bitrate, and click “Render” to export the stabilized footage.
Best Practices for Using the Warp Stabilizer in Adobe After Effects:
To achieve optimal results when using the Warp Stabilizer in Adobe After Effects, consider the following best practices:
- Use High-Quality Footage: The Warp Stabilizer works best with high-quality footage that has clear and distinct features, textures, and colors. Use footage that is well-lit, properly exposed, and free from noise or artifacts for optimal stabilization results.
- Adjust Stabilization Settings: Experiment with different stabilization settings such as smoothness, method, framing, and detailed analysis to find the optimal settings for your footage. Adjust settings based on the type and severity of camera movement to achieve the desired stabilization effect.
- Monitor Progress: Monitor the progress of the stabilization process in the Effect Controls panel to ensure that the stabilization analysis is proceeding smoothly. If the stabilization process encounters any errors or issues, review the footage and make necessary adjustments to the stabilization settings.
- Refine Stabilization: After applying stabilization adjustments, preview the stabilized footage in the Composition panel to assess the stabilization effect. Make any necessary adjustments or refinements to the stabilization settings to achieve the desired result.
- Test and Iterate: Test stabilized footage on different devices and screens to ensure that it appears as intended across various viewing platforms. Iterate on stabilization settings based on feedback from viewers or collaborators to refine and improve the visual impact of the stabilized footage.
Conclusion:
In conclusion, the Warp Stabilizer is a powerful tool in Adobe After Effects that allows users to stabilize shaky or handheld footage with ease. By understanding the key components of using the Warp Stabilizer, mastering stabilization techniques and controls, and following best practices for using the Warp Stabilizer, you can achieve smooth and professional-looking results that enhance the quality and visual appeal of your footage. So, dive into the world of stabilization, experiment with different techniques and settings, and unlock the full potential of the Warp Stabilizer in Adobe After Effects to create smooth and steady shots that captivate and engage your audience.


