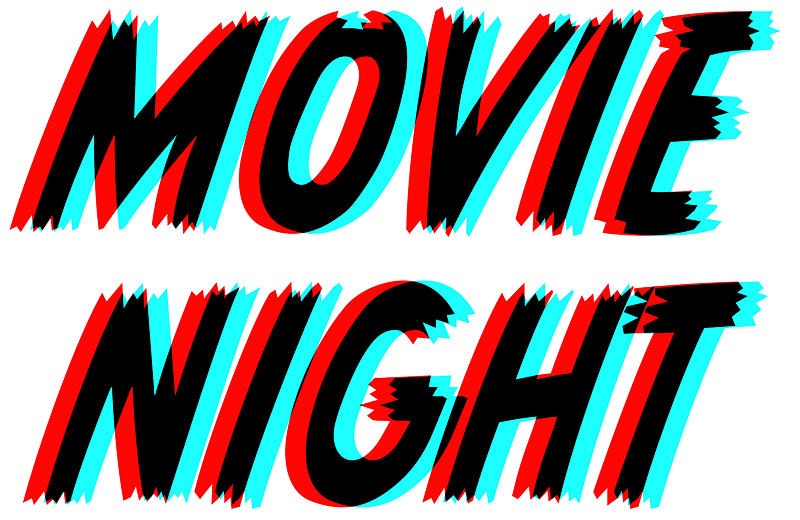
Nostalgic Revival: A Comprehensive Guide to Crafting Retro 3D Text with Photoshop

Introduction:
In the vast expanse of digital design, the allure of retro aesthetics continues to captivate designers, offering a nostalgic journey back in time. Among the techniques that pay homage to the iconic styles of yesteryear, creating retro 3D text stands out as a dynamic and visually striking method. Adobe Photoshop, a haven for digital creatives, provides the tools necessary to breathe life into this vintage-inspired design element. In this extensive guide, we will embark on a comprehensive exploration of the intricate steps and techniques involved in crafting retro 3D text with Photoshop, catering to designers seeking to infuse their projects with a touch of nostalgic charm.
Understanding the Fundamentals:
Before delving into the nuanced world of retro 3D text, it’s essential to familiarize yourself with the foundational tools and concepts within Photoshop. A solid understanding of the Text Tool (T), Layers Panel, and Layer Styles will serve as the backbone for our creative journey. Ensure you are comfortable navigating Photoshop’s interface, as this knowledge will enhance your efficiency throughout the tutorial.
Setting the Stage:
- Create a New Document: Launch Photoshop and create a new document by navigating to “File” > “New.” Define the dimensions and resolution based on your project requirements. A high-resolution canvas is recommended for optimal quality.
- Background Preparation: Set the stage for your retro 3D text by creating a background that complements the overall aesthetic. Experiment with vintage-inspired textures, gradients, or patterns that evoke the essence of bygone eras.
Crafting the Retro 3D Text:
Now, let’s delve into the process of creating retro 3D text in Photoshop:
- Text Input: Use the Text Tool (T) to input the desired text onto the canvas. Select a font that aligns with the retro theme; fonts reminiscent of the 1970s and 1980s often work well for this style. Experiment with the size and spacing to achieve the desired typographic look.
- Text Layer Styling: With the text layer selected, access the Layer Styles by clicking on the “fx” icon at the bottom of the Layers Panel. Choose “Bevel & Emboss” to add a three-dimensional effect to the text. Adjust the settings, such as Depth and Size, to create a subtle yet impactful beveled appearance.
- Texture Overlay: To enhance the retro feel, incorporate a texture overlay on the text. This could be a distressed texture, grunge pattern, or any vintage-inspired texture of your choice. Experiment with blending modes, such as Overlay or Multiply, to integrate the texture seamlessly.
- Color Palette: Select a color palette that resonates with retro aesthetics. Pastel hues, muted tones, or vibrant, saturated colors reminiscent of the 80s can evoke the desired nostalgic vibe. Apply the chosen colors to the text using the Color Overlay option in the Layer Styles.
Adding 3D Extrusion:
To achieve the classic 3D extrusion effect:
- Convert to Smart Object: Right-click on the text layer and choose “Convert to Smart Object.” This step allows for non-destructive editing and enables us to apply 3D extrusion.
- 3D Extrusion: With the smart object selected, navigate to “3D” > “New 3D Extrusion from Selected Layer.” Photoshop will convert the text into a 3D extruded object. Adjust the extrusion depth to your preference.
- Positioning and Lighting: Manipulate the 3D text by rotating, scaling, or repositioning it within the 3D space. Experiment with different lighting angles to cast shadows and highlights, enhancing the overall three-dimensional appearance.
Fine-Tuning and Creative Exploration:
Creating retro 3D text is a nuanced process that benefits from fine-tuning and creative exploration:
- Adjusting Shadows and Highlights: Refine the 3D extrusion by adjusting the intensity and direction of shadows and highlights. This step adds depth and realism to the retro 3D text.
- Texture and Pattern Integration: Experiment with integrating additional textures or patterns onto the 3D text. This could include elements like halftone patterns, distressed effects, or retro-inspired motifs.
- Glows and Effects: Enhance the retro ambiance by incorporating glows, lens flares, or other atmospheric effects. Use the Layer Styles menu to add Outer Glow or Inner Glow for a subtle radiance.
- Color Grading: Apply color grading techniques to the overall composition to achieve a cohesive and harmonious look. Adjust the saturation, contrast, or use gradient maps to fine-tune the color scheme.
Creative Applications:
The ability to create retro 3D text opens up a realm of creative possibilities:
- Vintage-Inspired Branding: Elevate branding materials by incorporating retro 3D text in logos, banners, or product names, adding a touch of nostalgia and authenticity.
- Event Posters and Flyers: Craft eye-catching event posters or flyers by featuring retro 3D text, setting the tone for vintage-themed events or parties.
- Album Covers and Artwork: Infuse retro vibes into album covers or digital artwork by integrating 3D text with a vintage aesthetic, creating a visual narrative that resonates with the music or theme.
- Social Media Graphics: Stand out on social media platforms by incorporating retro 3D text in graphics and promotional materials, offering a unique and engaging visual experience.
Saving and Exporting:
Once satisfied with your retro 3D text design, it’s time to save and export your creation. Choose the appropriate file format based on your project requirements, ensuring your design is preserved in high resolution and suitable for its intended use.
Conclusion:
Mastering the art of creating retro 3D text with Photoshop is a journey that invites designers to channel the spirit of bygone eras and infuse modern designs with a touch of nostalgic charm. Armed with an understanding of layer styles, 3D extrusion, and creative experimentation, designers can transform ordinary text into a dynamic and visually captivating element. This comprehensive guide serves as a roadmap for both beginners and seasoned designers, offering a step-by-step journey into the mesmerizing realm of retro 3D typography within the versatile canvas of Adobe Photoshop.


