Precision in Practice: A Comprehensive Guide to Crafting Vector Medical Illustrations in Adobe Illustrator

Introduction:
In the ever-evolving field of medicine and healthcare, visual communication plays a vital role in conveying complex concepts, procedures, and anatomical structures. Adobe Illustrator stands as a powerful tool for medical illustrators, designers, and educators seeking to create precise, informative, and visually engaging illustrations. Whether you’re illustrating anatomical diagrams, medical procedures, or scientific concepts, mastering the art of creating vector medical illustrations in Adobe Illustrator opens up a world of possibilities for accurately depicting the intricate world of human anatomy and medical science. In this comprehensive guide, we’ll embark on a journey to explore the techniques and tools needed to craft vector medical illustrations, empowering you to create stunning visuals that educate, inform, and inspire.
Chapter 1: Research and Reference
Before diving into the creation process, it’s essential to conduct thorough research and gather reference materials to inform your medical illustration. Consult medical textbooks, journals, and online resources to gather accurate information about anatomical structures, physiological processes, and medical procedures. Study reference images, diagrams, and illustrations to understand the visual conventions and standards used in medical illustration. Pay attention to details such as proportions, perspectives, and labeling conventions to ensure the accuracy and clarity of your illustration.
Chapter 2: Setting Up Your Illustrator Document
With your research and reference materials in hand, it’s time to set up your Adobe Illustrator document. Create a new document with dimensions that suit your intended illustration size and resolution. Consider the orientation and aspect ratio that best fits your composition, whether it’s a portrait-oriented diagram or a landscape-oriented scene. Organize your workspace by creating layers for different elements of your illustration, such as anatomical structures, labels, and annotations, to facilitate easy editing and manipulation.
Chapter 3: Drawing Anatomical Structures
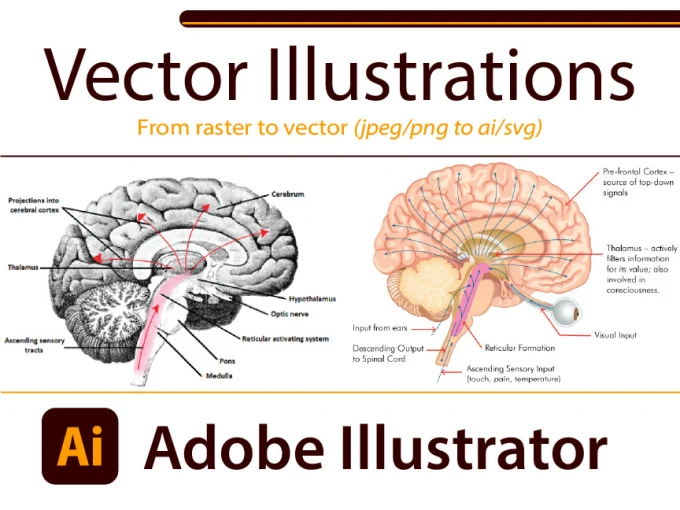
Once your document is set up, begin drawing anatomical structures using the pen tool, shape tools, and drawing tablet in Adobe Illustrator. Focus on capturing the precise shapes, proportions, and details of anatomical structures such as organs, bones, muscles, and tissues. Refer to your research and reference materials to ensure accuracy and realism in your illustration. Use layers and groups to organize your anatomical structures logically, making it easier to manage and edit them as needed.
Chapter 4: Adding Labels and Annotations
In addition to drawing anatomical structures, it’s important to add labels and annotations to your medical illustration to provide context and clarity. Use the type tool to add text labels, annotations, and descriptions to identify anatomical structures, highlight key features, and explain physiological processes. Experiment with using different fonts, sizes, and styles to distinguish different types of text and enhance readability. Align and position labels strategically to ensure they complement the overall composition and flow of your illustration.
Chapter 5: Applying Color and Texture
Once you’ve drawn anatomical structures and added labels, it’s time to apply color and texture to your medical illustration. Use the fill and stroke options in Adobe Illustrator to apply color to anatomical structures, using reference images and color guides to ensure accuracy and realism. Experiment with using gradients, patterns, and textures to add depth and dimension to your illustration, creating a sense of realism and depth. Pay attention to details such as lighting, shading, and highlights to enhance the three-dimensional appearance of your anatomical structures.
Chapter 6: Incorporating Medical Procedures and Concepts
In addition to depicting static anatomical structures, consider incorporating dynamic elements such as medical procedures and concepts into your medical illustration. Use the pen tool and shape tools to draw diagrams and illustrations of medical procedures such as surgeries, treatments, and diagnostic tests. Experiment with using arrows, lines, and callouts to illustrate the flow of processes and sequences. Use layers and groups to organize your procedural elements logically, making it easier for viewers to follow along and understand.
Chapter 7: Fine-Tuning and Refining
Once you’ve added all the elements to your medical illustration, take time to fine-tune and refine the composition to achieve the desired look and feel. Use the direct selection tool to adjust individual anchor points and paths, refining shapes, contours, and proportions to enhance the accuracy and realism of your illustration. Experiment with adjusting colors, gradients, and textures to achieve the perfect balance and harmony in your composition. Pay attention to details such as composition, balance, and focal points to ensure a cohesive and visually compelling illustration.
Chapter 8: Saving and Sharing Your Medical Illustration
Once you’re satisfied with your medical illustration in Adobe Illustrator, it’s important to save and share your artwork for sharing or distribution. Save your Illustrator document in a compatible file format, such as AI or PDF, to preserve the vector properties of your artwork. If you’re creating artwork for web or screen-based applications, consider exporting it as an SVG file for scalability and compatibility with web browsers. For print-based projects, export your artwork as a high-resolution raster image in formats such as JPEG or PNG.
Conclusion:
Crafting vector medical illustrations in Adobe Illustrator is a journey of precision, accuracy, and creativity, offering endless possibilities for accurately depicting the intricate world of human anatomy and medical science. By understanding the techniques and tools needed to research and reference, set up your Illustrator document, draw anatomical structures, add labels and annotations, apply color and texture, incorporate medical procedures and concepts, fine-tune and refine, and save and share your medical illustration, you’ll be able to create stunning visuals that educate, inform, and inspire viewers. So grab your stylus, set your sights on the canvas, and let Adobe Illustrator become your trusted ally for creating accurate and visually compelling medical illustrations that elevate the practice of healthcare and medicine.


