Mastering Tool Changes in PowerMill Ultimate: A Comprehensive Guide for CNC Machinists
Introduction:
Programming tool changes is a crucial aspect of CNC (Computer Numerical Control) machining that directly impacts efficiency, productivity, and machining quality. PowerMill Ultimate, developed by Autodesk, is a powerful CAM (Computer-Aided Manufacturing) software widely used in the manufacturing industry for generating toolpaths, simulating machining operations, and programming CNC machines. Understanding how to program tool changes effectively in PowerMill Ultimate is essential for optimizing machining processes and achieving accurate and reliable results. In this comprehensive guide, we will delve into the intricacies of programming tool changes in PowerMill Ultimate, covering essential concepts, workflow, best practices, and advanced techniques. Whether you’re a novice CNC machinist or an experienced professional seeking to enhance your programming skills, this guide will equip you with the knowledge and skills necessary to master tool changes effectively in PowerMill Ultimate.
Understanding Tool Changes in PowerMill Ultimate:
Tool changes in PowerMill Ultimate refer to the process of switching between different cutting tools during machining operations to perform various machining tasks on a workpiece. PowerMill Ultimate offers robust capabilities for programming tool changes, allowing machinists to define tool change points, tool selection criteria, toolpath synchronization, and tool management strategies. By mastering tool changes in PowerMill Ultimate, machinists can optimize machining efficiency, minimize downtime, and ensure seamless transitions between different machining operations.
Navigating the PowerMill Ultimate Interface:
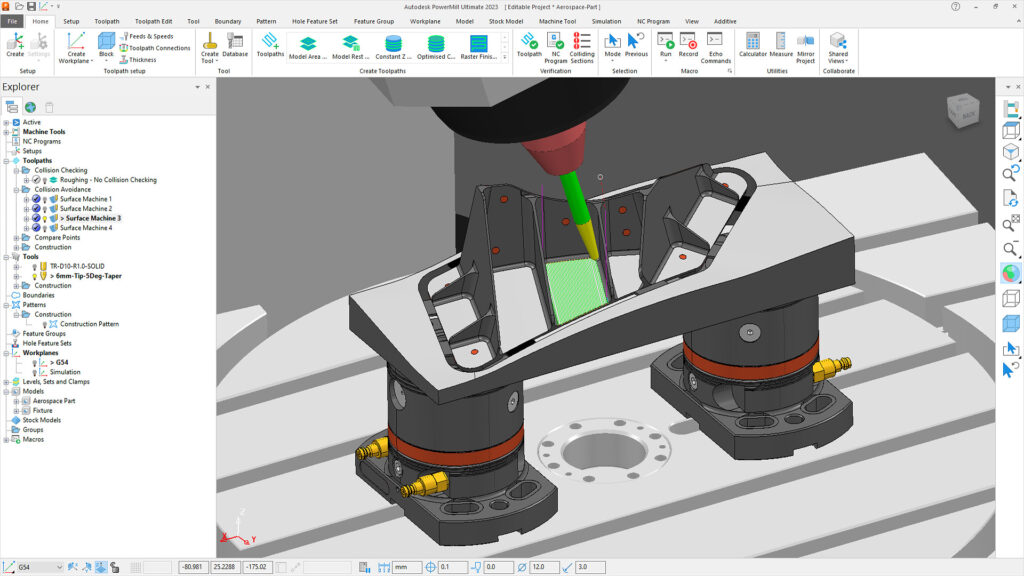
Before programming tool changes in PowerMill Ultimate, familiarize yourself with the software interface and navigation tools. The PowerMill Ultimate interface consists of various menus, toolbars, panels, and viewport windows that provide access to different functionalities and features. Understand the purpose and function of each interface element, such as the Ribbon Bar for accessing commands, the Browser for organizing project data, the Graphics Window for visualizing toolpaths, and the Tool Database for managing cutting tools and tool assemblies. Practice navigating the interface and performing basic tasks to become comfortable with the software environment.
Creating and Importing Tool Libraries:
To program tool changes in PowerMill Ultimate, create or import tool libraries containing information about cutting tools, toolholders, and tool assemblies. PowerMill Ultimate supports various tool library formats, including proprietary formats such as .tlb files and industry-standard formats such as ISO 13399. Create custom tool libraries by specifying parameters such as tool type, geometry, dimensions, speeds, feeds, and material properties. Alternatively, import tool libraries from external sources or third-party vendors to access a wide range of pre-defined cutting tools and tool assemblies. Organize tool libraries into categories and groups for easy navigation and selection during toolpath programming.
Defining Tool Change Points and Sequences:
Once tool libraries are available, define tool change points and sequences in PowerMill Ultimate to specify when and where tool changes occur during machining operations. Identify critical points in the toolpath where tool changes are required, such as toolpath start points, toolpath end points, feature transitions, or machining regions with different tooling requirements. Use the Tool Change Points command in PowerMill Ultimate to insert tool change points at desired locations along the toolpath. Arrange tool change sequences based on machining priorities, tool availability, and cutting tool requirements, ensuring smooth transitions between consecutive tool changes.
Selecting Cutting Tools and Toolholders:
After defining tool change points and sequences, select cutting tools and toolholders from the available tool libraries in PowerMill Ultimate. Use the Tool Selection dialog box to browse, search, and filter cutting tools based on criteria such as tool type, diameter, length, flute count, and material compatibility. Preview tool geometry, dimensions, and properties to verify suitability for the machining operation. Select appropriate toolholders and adapters to accommodate selected cutting tools and ensure compatibility with machine tool spindle interfaces. Assign selected cutting tools and toolholders to specific tool change points in the toolpath sequence, maintaining consistency and accuracy throughout the machining process.
Configuring Tool Change Parameters:
Configure tool change parameters in PowerMill Ultimate to customize tool change behaviors, synchronization options, and safety measures during machining operations. Access the Tool Change Parameters dialog box to define parameters such as tool change clearance distances, retract distances, tool change speeds, and tool change approach angles. Specify tool change synchronization settings to coordinate tool changes with machine movements, tool repositioning, and workpiece reorientation. Implement safety checks and collision avoidance measures to prevent tool collisions, interference, or damage during tool changes. Experiment with different parameter settings to optimize tool change performance and minimize machine downtime.
Simulating and Verifying Tool Changes:
Before executing tool changes on the CNC machine, simulate and verify tool changes in PowerMill Ultimate using built-in simulation tools and visualization capabilities. Use the Verify command to simulate the entire machining process, including tool changes, tool movements, material removal, and part deformation. Analyze simulation results to identify potential issues, such as tool collisions, clearance violations, or toolpath errors, and take corrective actions as needed. Utilize collision detection features to detect and resolve collisions between cutting tools, toolholders, workpiece surfaces, and machine components during tool changes. Validate tool change sequences and parameters through iterative simulation and verification, ensuring safe and reliable machining operations.
Optimizing Tool Change Strategies:
Optimize tool change strategies in PowerMill Ultimate to improve machining efficiency, minimize cycle times, and enhance productivity. Analyze machining sequences, tool change points, and tool change sequences to identify opportunities for optimization. Consolidate tool changes by grouping consecutive tool changes at nearby locations to reduce tool change time and minimize machine downtime. Implement tool change strategies such as tool pre-staging, where tools are pre-positioned near tool change points to expedite tool changes and streamline machining operations. Fine-tune tool change parameters, synchronization settings, and safety measures based on simulation results and real-world performance data to achieve optimal tool change performance.
Documenting and Reviewing Tool Change Procedures:
Document tool change procedures and review them regularly to ensure consistency, accuracy, and repeatability in machining operations. Create standard operating procedures (SOPs) or work instructions detailing tool change sequences, parameters, and safety protocols for different machining scenarios. Provide training and instruction to operators and machinists on proper tool change procedures, machine operation, and safety precautions. Conduct periodic reviews and audits of tool change processes to identify areas for improvement, address issues, and incorporate feedback from operators and supervisors. Document lessons learned, best practices, and troubleshooting tips to facilitate knowledge sharing and continuous improvement initiatives.
Implementing Best Practices and Safety Measures:
To ensure safe and efficient tool changes in PowerMill Ultimate, implement best practices and safety measures throughout the machining process. Some recommended practices include:
Regularly inspect and maintain CNC machines, cutting tools, toolholders, and machine accessories to ensure optimal performance and reliability.
Train operators and machinists on proper machine operation, tool handling, and safety procedures for tool changes and machining operations.
Establish clear protocols for tool change setup, verification, and execution to minimize errors and ensure consistency.
Provide adequate personal protective equipment (PPE) such as safety glasses, gloves, and ear protection to operators and personnel working in the machining area.
Adhere to industry regulations, safety standards, and best practices for machine guarding, lockout/tagout procedures, and hazard mitigation in the machining environment.
Conclusion:
Programming tool changes in PowerMill Ultimate is a fundamental aspect of CNC machining that enables machinists to optimize machining processes, minimize downtime, and ensure safe and reliable machining operations. By understanding the principles of tool changes, navigating the PowerMill Ultimate interface, creating and importing tool libraries, defining tool change points and sequences, selecting cutting tools and toolholders, configuring tool change parameters, simulating and verifying tool changes, optimizing tool change strategies, documenting and reviewing tool change procedures, and implementing best practices and safety measures, machinists can master the art of tool changes effectively in PowerMill Ultimate. With the knowledge and skills acquired from this guide, machinists can streamline their programming workflows, enhance machining capabilities, and achieve exceptional results in CNC machining applications.


